How to Update and Manage Your Event
Edit event details, swap the banner, assign event coordinators, and oversee registrations after your event is live.
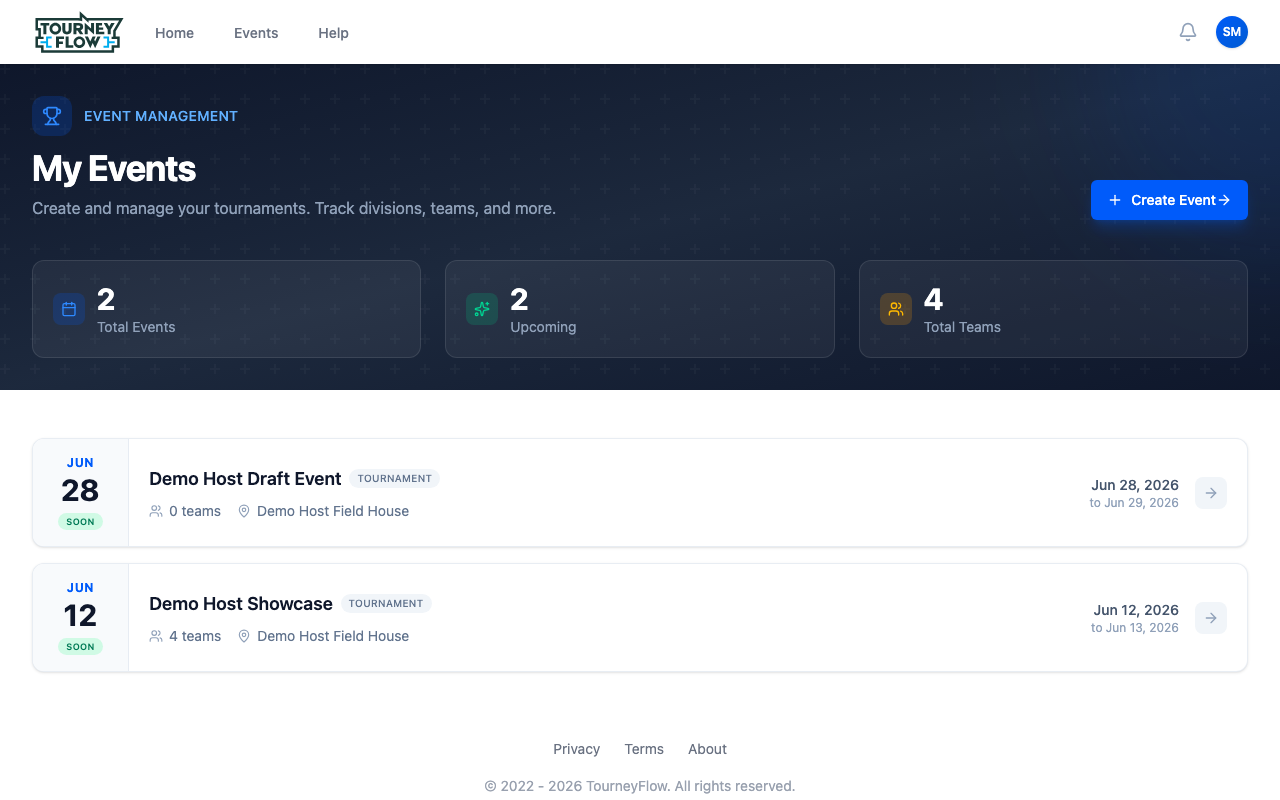
Step 1: Open Your Events
Open the account menu (avatar in the top‑right) → Events, or go directly to My Events. Each card shows the date, location, team count, and a quick status indicator.
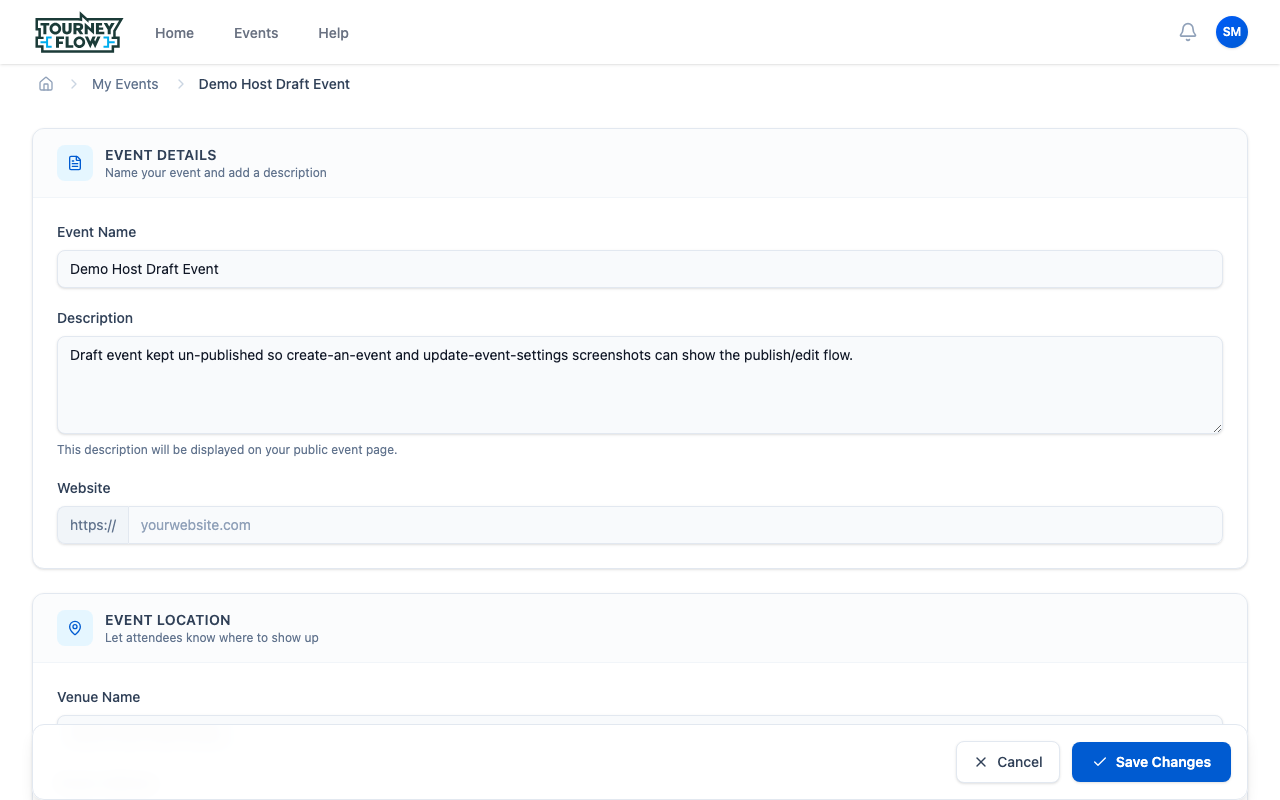
Step 2: Edit the Event Details
Click the event you want to update, then click Edit Event in the top‑right of the event hero. The full event form opens with everything editable:
- Event Name and Description (markdown supported)
- Website URL for your own marketing page
- Start / End dates, timezone
- Event Location — venue name, address, and map pin
- The hero banner image (use Change Banner on the event hero)
Click Save Changes at the bottom to apply. Changes on a published event go live immediately.
Note
Changes to dates propagate to your divisions: deadlines stay where you set them, but tournament schedule windows shift if they were tied to event start/end. Double‑check division pages after a date change.
Step 3: Manage Coordinators
Scroll down to the Event Coordinators panel on the right of the event detail page. Event coordinators can edit the event itself and manage every division underneath — useful for partners or board members who need full access.
Click + Add to invite a coordinator by email. Existing coordinators show in the Active Coordinators list with their name, email, and a kebab menu to remove access.

Tip
For division‑scoped helpers (e.g. someone running a single bracket), assign them as a division coordinator instead — see Set Up and Manage Divisions. Division coordinators can manage their division without touching the rest of the event.
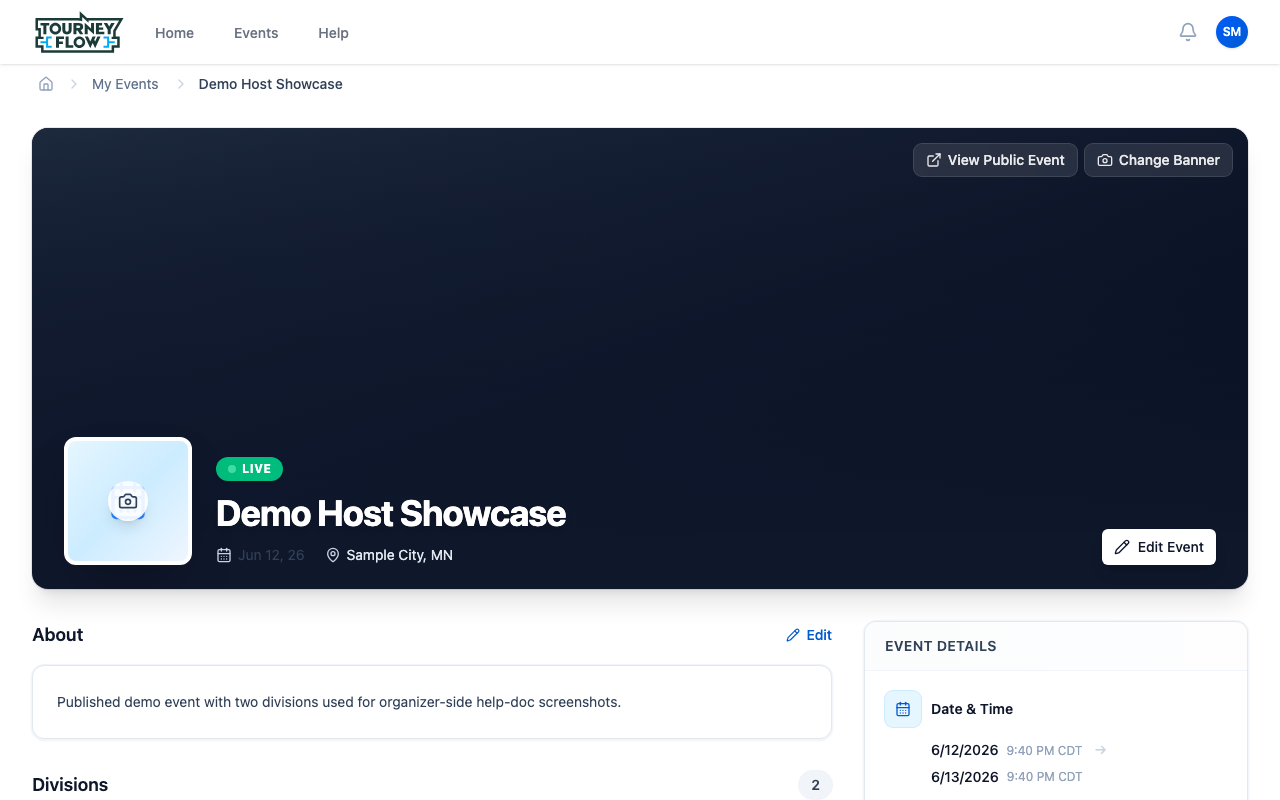
Step 4: See Registrations Across Divisions
Back at the top of the event page, the Divisions section gives you a one‑glance picture across every division:
- Team count vs. team limit (e.g. 4 TEAMS out of 16)
- Free vs. paid divisions
- Status indicators for the linked tournament (Tournament card on each division)
Click any division to drill in — that's where per‑division team management, payments, documents, and tournaments live.
Step 5: Publish Results (After Your Tournament)
When a division's tournament finishes, head to the division detail page and use the publish results action. Published results:
- Appear on the public event page for everyone to see
- Generate achievement badges for winning teams (visible on their team profile)
- Lock the bracket so scores can't be edited after the fact
If you need to fix something post‑publish, unpublish first, make the change, and republish.
What's Next?
- Set up additional divisions
- Create and run a tournament for any division that's ready