How to Create and Publish an Event
Walk through the event wizard, set your dates and divisions, save your draft, and publish it for participants.
Before You Begin
You need a TourneyFlow account. If you don't have one yet, sign up here.
Note
The event wizard has three steps — Create Event → Divisions → Preview. You can save and come back at any point; nothing is published until you say so.
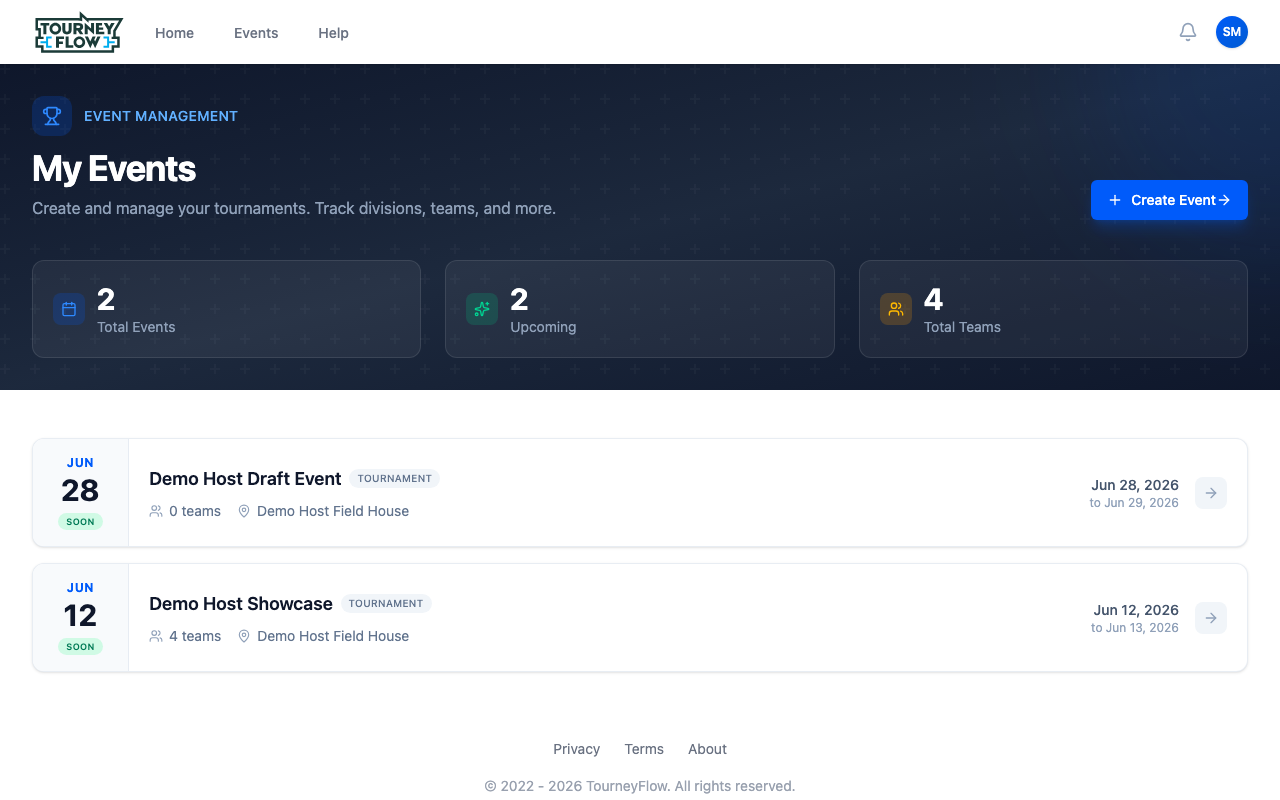
Step 1: Open Your Events
Open the account menu (avatar in the top‑right) → Events to land on My Events. Past events live here too — toggle between Upcoming and Past with the tabs at the top.
Step 2: Start the Wizard
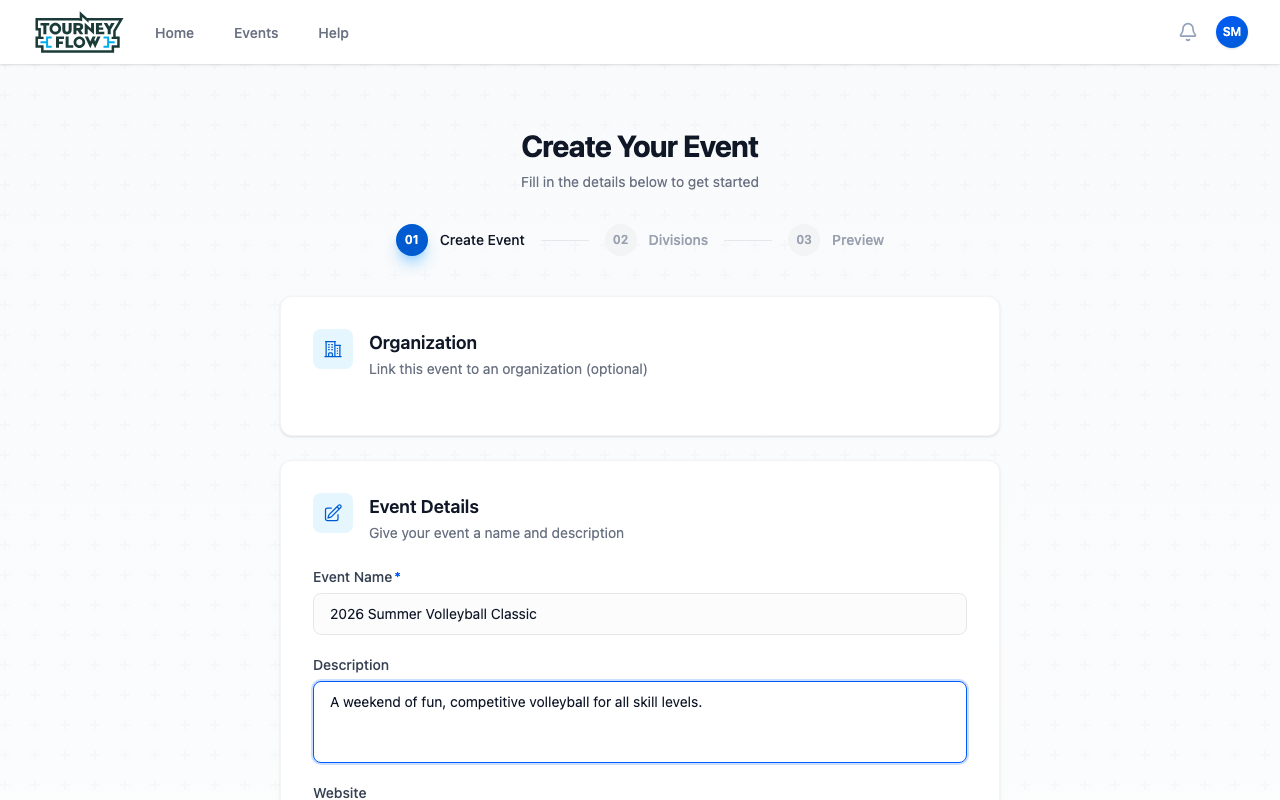
Click + Create Event. The first step of the wizard, Create Event, asks for the basics.
Fill in:
- Organization (optional) — link the event to an org for shared management. Leave empty for a personal event.
- Event Name (required) — what participants will see in search and on the public page (e.g. "2026 Summer Volleyball Classic").
- Description — markdown is supported.
- Website — your own marketing site if you have one.
Scroll past Event Details to set your start/end dates, timezone, and location.
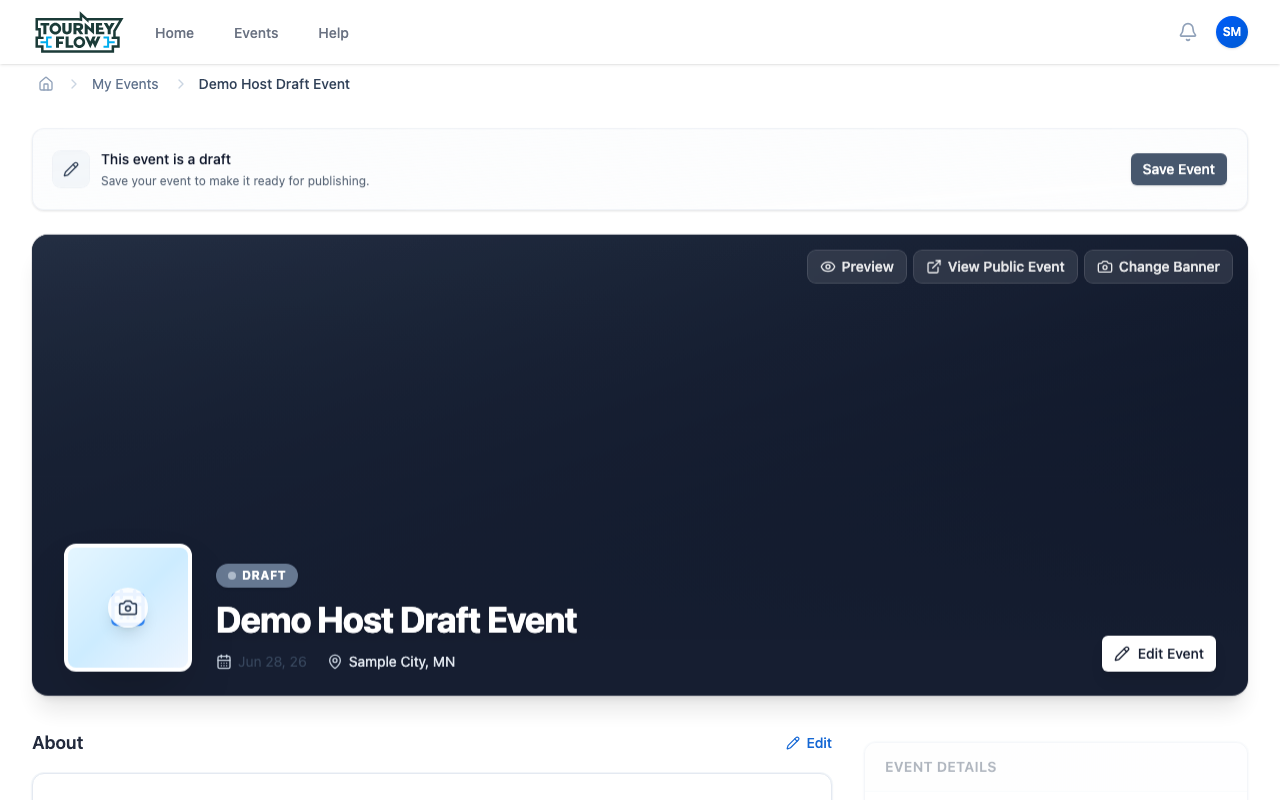
Step 3: Save Your Draft
Click Save Event at the bottom of the wizard. The event lands as a draft — only you (and any coordinators you assign) can see it. You'll arrive on the event management page with a yellow banner reminding you the event is in draft state.
From here you can:
- Use Edit Event to fix any details
- Click Change Banner to upload a hero image (recommended size shows in the picker)
- Click Preview or View Public Event to see what participants will see when you publish
Tip
Add at least one division (with team limits, deadlines, and any fees) before publishing. Participants can register the moment they see the event — you don't want them landing on an empty page.
Step 4: Add Divisions
Scroll down to the Divisions section on your draft event and click + Add Division. Each division is a separate registration pool with its own deadline, team limit, roster limit, and (optionally) fees and document requirements. See How to Set Up and Manage Divisions for the full walk‑through.
Step 5: Publish
Once divisions are set up, return to the top of the event page and use the publish action (replaces the Save Event banner once the event is ready). The event status flips from DRAFT to LIVE, the event appears on the public Events page, and participants can start registering for any division you've opened.